How To Format Passport For Mac?
• Preamble The licenses for most software are designed to take away your freedom to share and change it. By contrast, the GNU General Public License is intended to guarantee your freedom to share and change free software--to make sure the software is free for all its users. Rt n66u router best configuration for mac laptop. Please see The GNU General Public License for the exact terms and conditions of this license.
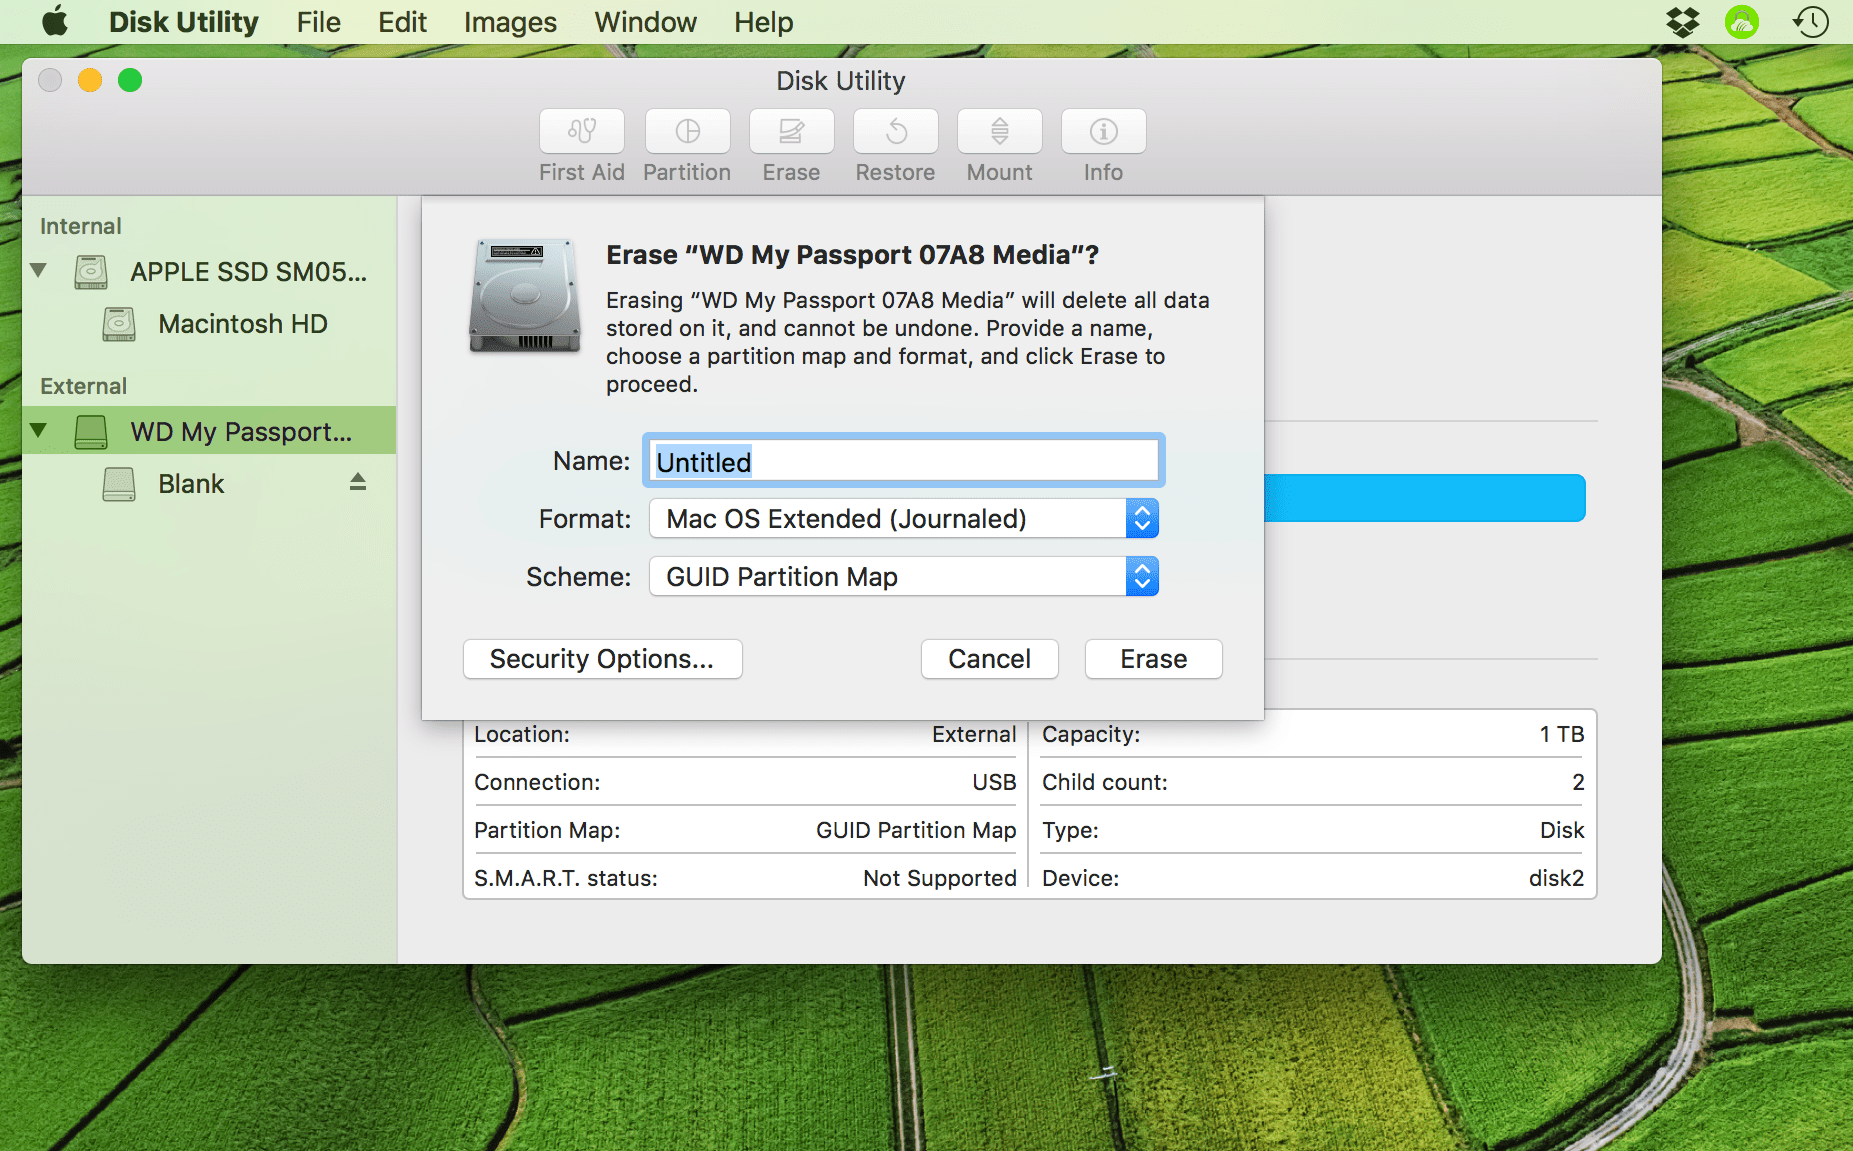
Dec 19, 2017 - The Paragon NTFS Driver for Mac allows macOS computers to Read, Write and Access WD NTFS formatted USB drives without reformatting. Connect it to your Mac and launch Disk Utility from Applications > Utilities. If the external drive is listed on the left side of the window, choose it by clicking on it once. In the Erase tab choose Mac OS Extended (Journaled) then click on the Erase button.
Hey there, Logan! You'd need to use a Mac to reformat your WD My Passport in a file system that can be read by Windows. The Mac is needed to store your files from the external HDD until you've reformatted it for use with Windows OS, because this change will result in erasing all the data on the drive. To avoid such future incidents, I recommend using the FAT32 file system because this format can be read and written to by both operating systems. Here's a tutorial that explains how to perform this: Hope this helps!

Video Channel: Format Mac OS Partition WD my Passport MAC OS Passport WD can't save files. How to Format to change this. Open Launch Pad or click 'Go' from Finder, click on Utility, then go to disk utility, click on 3 TB WD PASSPORT (or whatever your is) in the center click the word 'Partition' (if you don't see the word Partition you click the wrong one one the left) next in the drop box click '1 partition', on the right re name your Hard Drive to what ever you want., the click drop down box and click 'Mac OS extended journaled ' on the bottom click 'options ' then select ' GUID Partition Table' press ok and double check everything. Once done click 'Apply' on the bottom right takes a minute or two. Once down close all that out and your hard drive should now have all permission to do what's you want.